
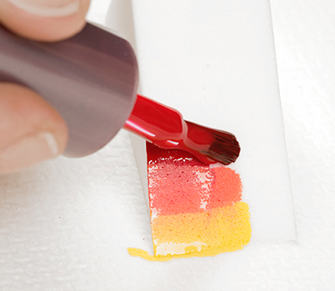
To start, you’ll need an unused makeup sponge – a foundation wedge will be ideal. Select three complementary coloured nail varnishes and apply three even strokes to the edge of your sponge. You want the colours to slightly overlap one another and measure the approximate length and width of your nail.

Dab your varnished sponge onto your nail, moving it up and down the length of it. The colours should blend and fix on your nails. Repeat several times, allowing the coats to dry between applications.


4
Now apply a topcoat of transparent polish. You may want to apply several layers to smooth out a bumpy surface. The added bonus of this final layer is that nails will stay chip-free for longer!
And you’re done! A sunset of shades, achieved in four easy steps!


